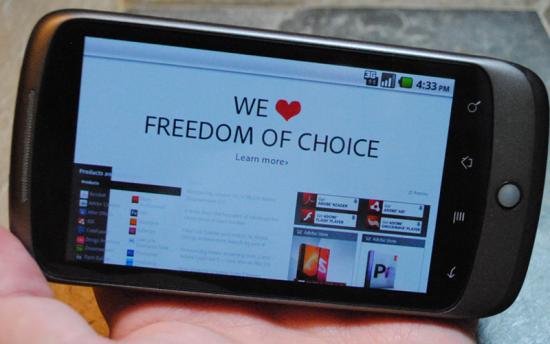
For those of you that don’t know, Froyo, Android 2.2, has been making its way to Nexus One users since last night. It was first reported by a user at TechCrunch, then someone at Engadget. Twitter was a flutter with users saying they received the OTA update as well. It only took about a half a day, but the users at XDA and MoDaCo finally got a system dump from someone and was able to put together some some updates for us to use.
There’s a few ways you can get Froyo on your Nexus One, all depending on what your current setup is. First of all, if you are unlocked with a custom Recovery installed, Paul at MoDaCo released a full, rooted update.zip that you can flash with the Recovery. You can find information here. This is the method I used. This includes the radio too, along with root built-in. It is recommended that you do a complete wipe before you install, although some people report that they’ve been fine flashing over their current ROM without wiping.
The official Google Update only works if you’re using the ERE27 ROM, which is from the T-Mobile version. You can download the update.zip from Google here. You need to have the stock ERE27 ROM and the stock Recovery installed for this to work.
There are other ways if you don’t want to go with one of these routes, but we won’t get into that here. One method can be found here and another here.
Previously, if you had a custom ROM with App2SD installed, then you know you had to partition your SD card and create an ext partition. You can delete that partition now because the new App2SD uses FAT32. Make sure you backup your SD card before you reformat your card!
One of the biggest things for Froyo is Flash, which is available in the Market, or go here in your mobile browser. If you want to get Hulu to work (even though Hulu has said they won’t support mobile devices), someone has posted a workaround here.
Next up is the built-in App2SD. Currently, the developers need to update their apps if they wish to enable this feature. There is another way though. Turn on USB Debugging, connect to your PC with AndroidSDK installed. From a command prompt, type adb devices to make sure your device shows up. If it does, then type adb shell pm setInstallLocation 2 to enable Install to SD Card as the default install method. You should also be able to move apps between Phone and SD now. If you want to disable it again, type adb shell pm setInstallLocation 0. You might need to be rooted for this to work.
The new App Reporting feature that was announced at Google I/O also seems to be working. If an app crashes, it lets you send a report to the developer.
As of now, there’s no FM radio available in the Nexus One. There’s been rumors about this, and we could still see something show up in the Market later on. The multi-touch issue is still there, although I’ve never had a problem with it unless I do the test. The launcher and overall system performance seems better as well. At one point I was seeing about 220Mb of RAM free after first boot. The new task switcher (long-press Home button) is better and shows more apps. The stock messaging app is a little different. It has a white background now and shows the contact pictures throughout the conversation.
The camera seems MUCH improved to me. Very smooth and better quality. Nicer settings layout too. The Gallery seems much smoother and faster as well. In the Gallery, when its showing you your albums, you can pinch-to-peek, which will show you a preview of the pictures in that album. Start with your fingers together on an album, then stretch them out.
In the call log, calls to/from the same contact are now grouped together. There are different vibrate options (always, never, only in silent mode, only when not in silent mode). Twitter is installed by default. YouTube has the option to default to HQ (High Quality) by default. In your settings you can now completely disable mobile data. There’s also the options for wired tether and wireless hotspot, although I haven’t tried these yet. If you connect your Nexus One to the PC, you now get a popup asking you if you want to mount in Mass Storage mode instead of having to go through the Notifications dropdown.
As of now, there doesn’t seem to be a way to change the trackball LED for things like missed calls, SMS, Emails, etc. I haven’t really received anything to test with, but some are reporting that different notifications do have different colors, there’s just no way to customize them. Also, the streaming music feature that was demoed at Google I/O might be a Gingerbread feature since there’s currently no way to do this on Froyo (at least none that we know of yet).
Update: Another thing is a small change in Exchange support. While it still only lets you sync 1 month of emails, and the folders still function the same, the Calendar now shows up in the stock Calendar app. You no longer need the CorpCal.apk. So that means you could also view it with your GMail calendars.
We’ll edit this as we find more things, so keep checking back!
